Sunday, March 31, 2013

My Coffee Filter Flower Arrangement Tutorial

My Coffee Filter Flower Tutorial
 
By no means am I unique or original in my creations! I am sure there are tons of tutorials on the web on how to make coffee filter flowers.  However, I am going to put my instructions on here as I adapted the instructions I found to suit my needs. (inexpensive and super quick!)
 
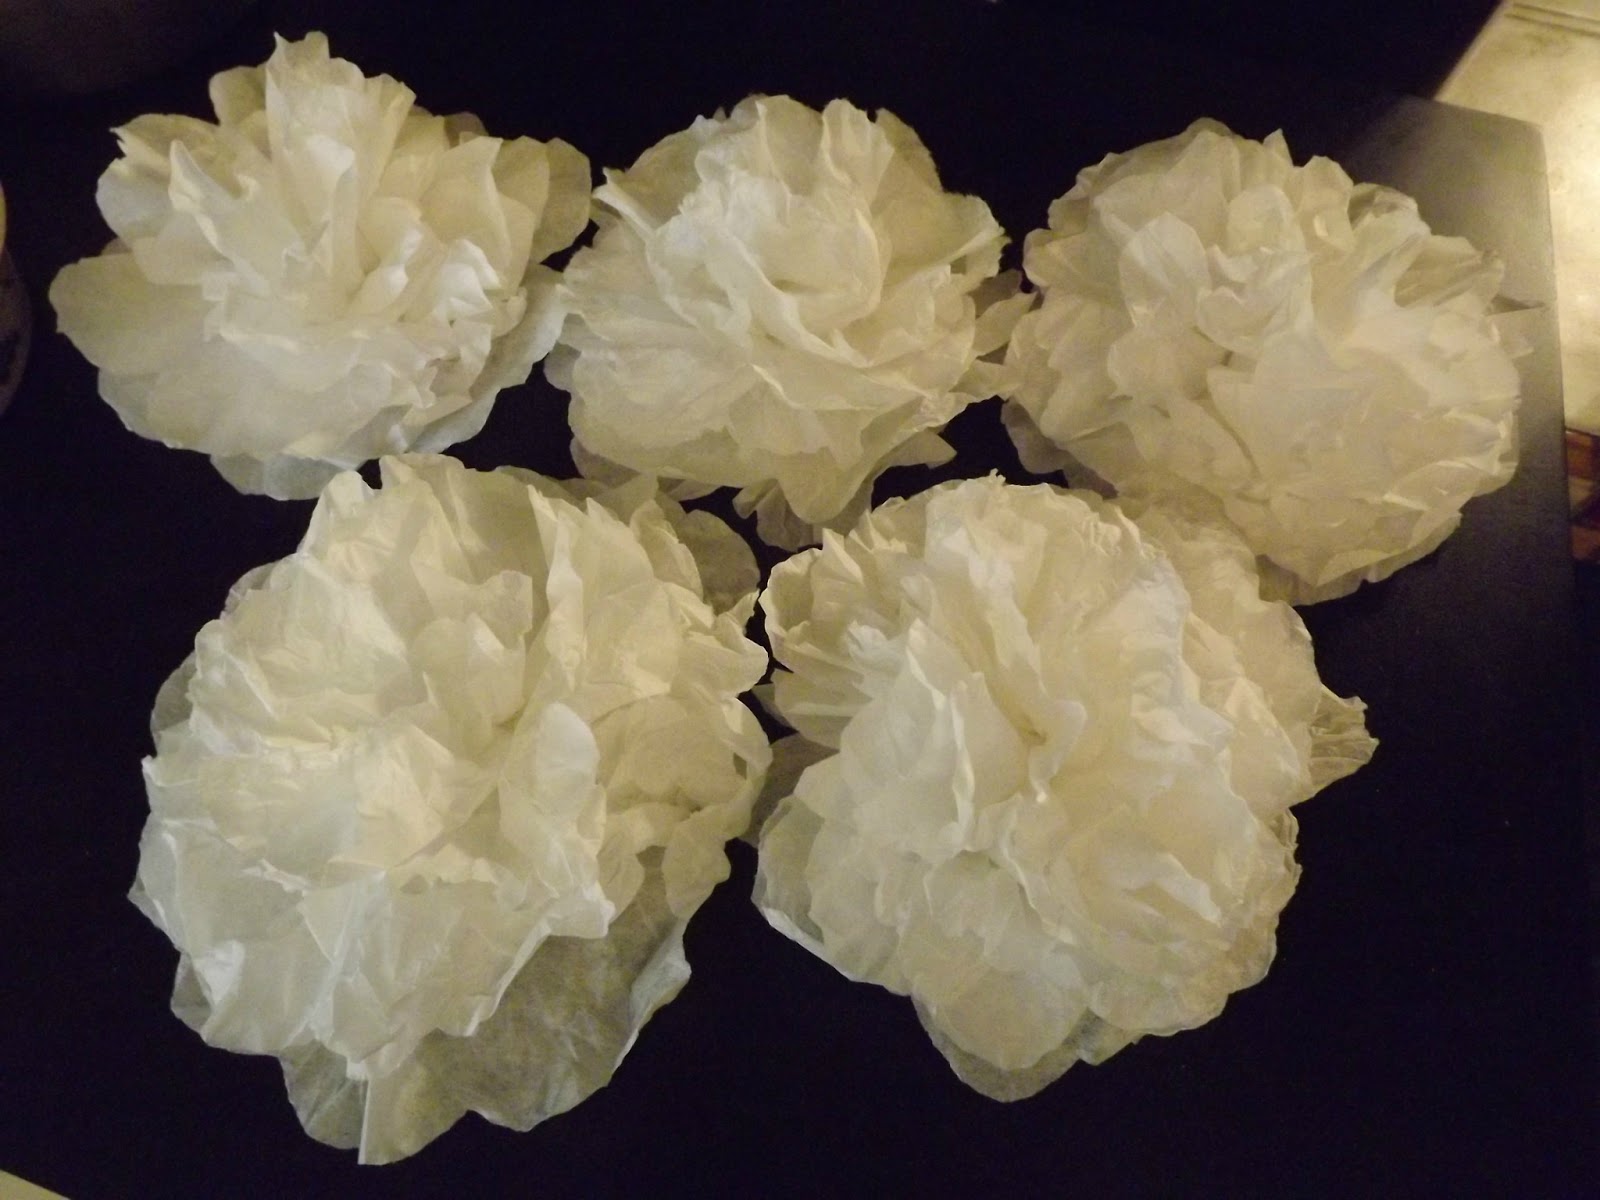
Aren't they pretty!!
 
 
Step 1: Get coffee filters and fold in half and in half and in half until you have a wedge. I was strong enough to cut through 4 or 5 at a time, but found that 3 at a time was much more efficient as I didn't have to struggle to cut them! In the second picture you can see how much of the edge I cut off some of the filters. The trick it to cut different amounts off so that you can different size filters.. ie petals!


After cutting a few sets, I decided that I liked the rough edge. So, I tore some of the edges off the filters and on some I took the blade of the scissors and roughed up the edge.
 
Step 2: Once you have some different size filters cut, open them all and make stacks with a couple of big, medium and small together. Some of my flowers have as few as 7 filters, some have as many as 14 filters. There is no science to this. Then fold in half and half again and staple the bottom of the wedge.


Step 3: Open back up. It won't lay flat. Take the top filter and pull up and scrunch together. Do this with each layer. Once all the layers are scrunched you will have a ball of scrunched filters.


Step 4: Pull open the layers and flatten out a little bit. You want the flower to be wrinkled and textured.
 
Continue the above steps until you have a bunch of flowers. It really is easier to make the flowers all at once so that you can paint them in one sitting. (these are words of experience...)
 

Step 5: Scrounge around the house for tidbits of paint. I found a bottle with a little of yellow, a small bottle of white and a new bottle of red. All were craft paints. If I had found house paints I would have used those. I don't believe in buying something for a project if something I have might work!

Pour some paint on a plate. Add some water.I don't know how much, just a little and swirl it around on the plate.

 
Step 6: Dip the flower in the paint. Swirl it around.


Step 7: Go to the kitchen sink and turn the water on softly and rinse out the flower. Yes, you are going to wash off some of the paint. Squeeze the flower, gently pulling the water from the staple to the tip of the petals.
 
Step 8: If desired, dip the tips into another color. Rinse.


Step 9: Lay the flowers out on newspaper or paper towels. You really need something absorbent. Not parchment paper.. (experience again.)

 
Step 10: After a little while, turn the flowers over so that the flowers won't get too squished on one side. 


(notice I found some paper towels!) 
 
Step 11: Only if you didn't make enough flowers the first time... go back and make more flowers, get caught by your 3 year old and let her help make flowers too. I don't recommend this step..)


Step 12: Now using my parchment paper... line a baking sheet with parchment paper and stand up flowers on it. Put in oven on the lowest setting your oven has... mine has a keep warm setting.
 
You only have to do this step if you are impatient like I am. But it works!! After a few minutes or so, turn the flowers over. then after a few more minutes, turn the oven off. 

 
Step 13: Place the flowers on clean paper towel to cool and cure.They aren't hot, just warm! If they are hot, you probably don't want to do this in your oven!


Step 14: Look around your house for some old artificial flowers that have pretty (or decent/usable) centers that you can pull the petals off and reuse the stems. Yes, I am that cheap.


Step 15: Find the center-ish of the flower and push your stem through. The center isn't useable as it has a staple in it!
Step 16: Place in a vase!


 Aren't they gorgeous!! And I love that I don't have to water them!!

Saturday, March 30, 2013

Another Bathroom Refresher!

Like many houses built in the mid 1970s, our house has a number of style issues. Today's problem deals with the tile.
 
The tiles are in good shape, just out of date!
 
So... what do you do? If it's like our tile and it's just the accent tile, fix it like I did today. If it's horrible, fix it like I did our other house about a month or so ago! (search for bathroom remodel)
 
Today, since this was a small project, I pulled out the finger nail polish and the paint pen.
Here is the before.
 
 
And here is the tile in progress. I used Sally Hansen 300 White polish to prime the gold accent tile becuase that is what my teenage daugther had.
 
A cool thing about this project was that Lexi could help.  Since nail polish is in a small bottle with a little brush, it is perfect for those inbetween kids to help with!


After we finished going around the walls once with fingernail polish, I went back over with white paintpen. If I had purchased more white fingernail polish, I would have just used that as it coated better, but I had a white paint pen and that did the trick as well.
 
Tada! 


I'm still deciding on the color of the mirror and looking for decorations that remind me of the ocean. I'm trying to stick with calming blues and greens. With 3 girls in and out of the bathroom I figure any calming force that we can use would be a good thing.

A Mommy and Daughter Date to the Ballet

My middle girl gets lost in the shuffle. As a middle girl myself I am probably more aware of that phenomenon than some. Some days I stop and ask myself when the last time Lexi was the sole focus of my or Doug's world. It's never an easy answer.
 
So, a couple of weeks ago, I had the chance to take Lexi to the ballet. Just the two of us! A touring company was performing Snow White and it was being advertised as a "bring your princess" event.  Perfect!
 
That night, of course we were running late with 75 different things going on, but Lexi and I cleaned up and made it to the auditorium for the production in time to get a decent seat, but we missed out on the cookie and punch preshow. Oh well! We decided that we would go out to eat afterwards, just the two of us!!
 

 Here we are waiting for the show to start!


Take note of the program. The graphic on the front of the cover was the same one on the posters and all advertisements. Please note the color of snow white's dress.

Yes, it's blue. She doesn't look like SNOW WHITE! I realized that, but I figured it would be okay.

In the audience that night there were probably 200 little girls wearing their princess dresses. Their DISNEY inspired princess dresses.

And here is what I learned. The ballet was a beautiful complex modern dance, GERMAN inspired performance of the "classic" tale. NOT DISNEY.

Therefore, my girl was not impressed. In fact, she was scared of the witch. The witch/evil queen lady was SCARY!! It was incredibly dark and weird. Not little girl friendly at all.

We sat through most of it while Lexi asked me questions about all the parts that were "wrong." Finally, right before the big showdown between the witch and Snow White we left. Lexi was scared of what was going to happen and I didn't feel like making my kid stay and then dealing with nightmares.

On our way out, it was interesting that a couple of grown women that are "movers and shakers" and big donors of our local art scene were also leaving. I heard their commentary. They weren't leaving because they had another engagement... maybe I wasn't the only one that wasn't cultured enough!

Since the show was a bust, I gave Lexi the option of eating ANYWHERE for dinner. I ran down the list of the "nice" restaurants... oh shock, she chose McDonalds. great. But hey, it was her night.

So, what did I learn from this outing? I learned that we are completely and totally disney-ified. We expect the "classic" fairy tales be told and represented in the Disney way. We wanted the yellow and blue dress and red bow on Snow White. (I can give you an accurate description because I am currently sporting a princess sticker on my hand!) It's a hard place for performing companies to be. I know, I've been a part of "classic" non-disney fairy tale productions. Companies want to be edgy and different. They can't afford the royalties and rights for the "big" show.. but in the end, at least in my world, they lost a potential return patron, because instead of inspiring my middle girl, they scared her.

What's next on the mommy and daughter agenda? I don't know...suggestions anyone?? :)

Friday, March 29, 2013

Lexi's Art Show Ribbon

Remember my really big artshow? Well, Lexi had work in it!
 
She LOVES art. She LIVES art.
 
So she was thrilled when she saw that she won a ribbon!

And I didn't have anything to do with it thank you very much!
I hope she always loves art. Even if she never recieves another ribbon.

my big 3 year old

The other evening Kylie came into my bedroom to show me the flower she made for me!
 
I think she might be an artist :)

The heart looking thing next to the flower is a vase. She told me the flower was standing up to go into the vase. Wow.

I have to say at 3, her flower and petals are more consistent and developed than some of my high school art 1 students!!

Isn't she adorable!
 
And look, she even signed her work! For the record, no one taught her to write her name! She just watched people write and and figured it out herself. Yes, I'm a proud momma.


Tuesday, March 26, 2013

Little Girls Wild About Dance!

Last week Lexi had Sting Camp. This is afterschool dance for a week with the drill team at the high school. She loved it!!
 
On Friday evening, they had a short performance.
 
Lexi's group was adorable.  There is just something about 2nd graders!! They aren't babies anymore, but they haven't made it to the gangly stage yet either. They are just cute!!

I can't remember the name of the song that they danced to, but they were cute and Lexi did a good job. She even remembered to smile sometimes! 


Here is Lexi with Shelby after the performance. I love knowing the girls that come into contact with my daughters at high school events!! Shelby is an awesome girl and I'd be thrilled if Lexi grew up to be an accomplished dancer and artist like Shelby!